On this page
Every rupee that is not a fee payment goes in as a voucher: electricity bills, salaries paid in cash, a donation, cash deposited in the bank. Add expense and Add income are on every Accounts tab.
Steps
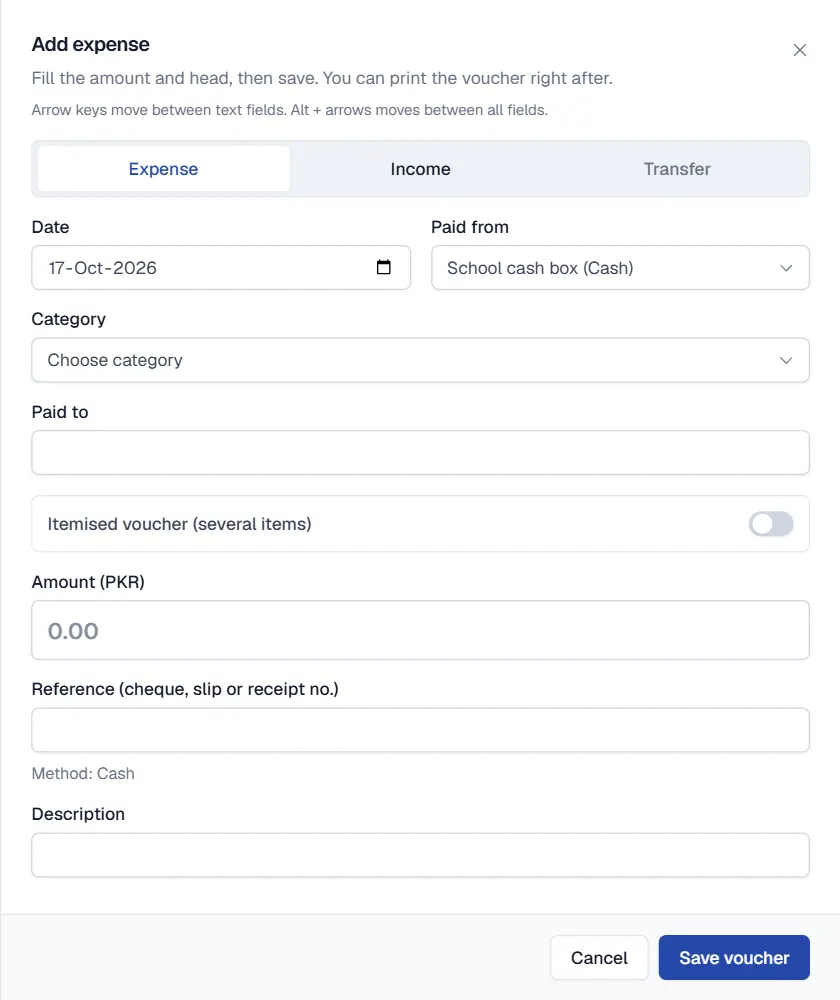
- Click Add expense or Add income. For moving money between your own accounts use Transfer between accounts.
- Fill the date and account. Choose the Date and the account the money was Paid from or Received into.
- Choose the category. Pick a Category such as Utilities, or use Add new category.
- Enter who and how much. Fill Paid to or Received from and the Amount. For several items on one bill, tick Itemised voucher (several items) and add each item with its amount.
- Add the reference. For a bank account enter the Reference (cheque, slip or receipt no.). It is required for bank vouchers.
- Click Save voucher. Qalamora shows the voucher number. Click Print voucher for a signed copy, or Add another.
Find and print vouchers
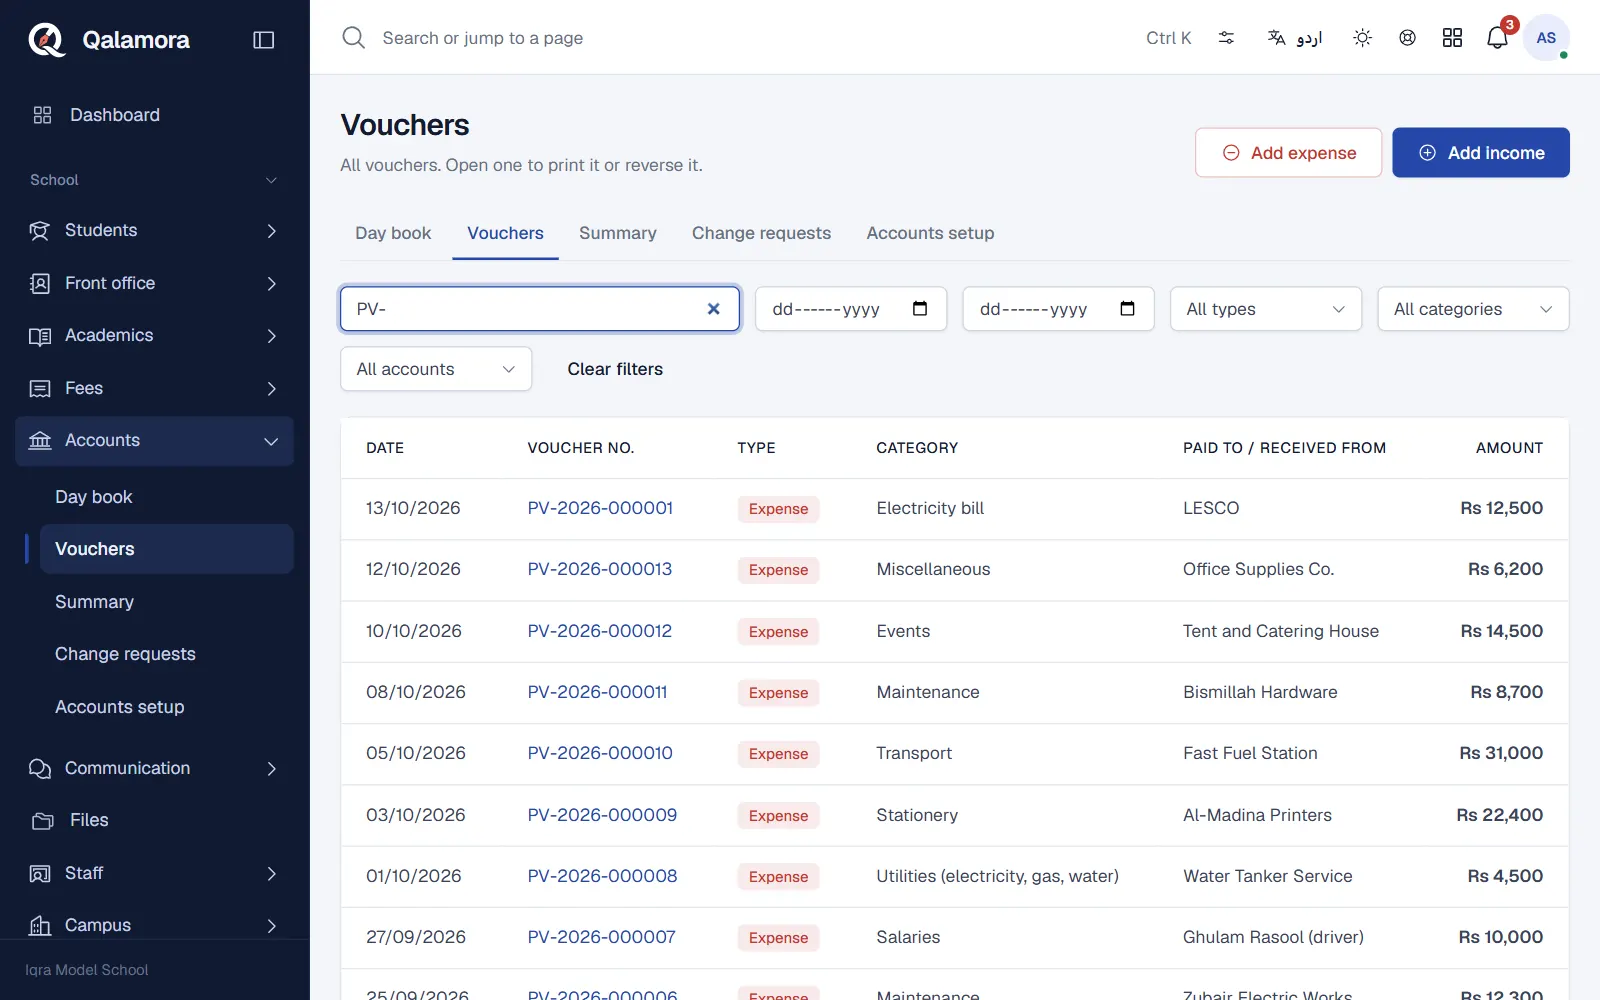
Open Accounts > Vouchers. Filter by type, account, category, date or text. Open a voucher to print it again. Printed vouchers are black and white ruled forms with the amount in words and signature boxes, in English or Urdu.
Important
A saved voucher is never edited. If something is wrong, correct the voucher with a reversal or a change request.
Related
Was this page helpful?
Good to hear. Your answer is not sent or saved.
Sorry about that. Tell us what was missing and we will improve this guide. Tell us